Written by ContentPowered.com
Shopify is one of the most popular online storefronts in the world, and for good reason. In a way, it’s like the WordPress of e-commerce. It has a solid base platform, and a wide variety of plugins – both official and user-created – to expand functionality. Unlike WordPress, it’s not free to use, but at a base price of $29 per month, it should be pretty easy for any store to sell enough to cover the costs and then some.
It stands to reason, then, that one of the easiest ways you can make a store profitable is to get exposure on Facebook. Since Facebook is the largest single gathering of human beings on the planet, you have a massive amount of exposure. All you need to do is somehow capture that exposure and convert it into customers. Thankfully, Shopify has a lot of different options when it comes to Facebook integration, and vice versa. Here are ten ways you can integrate the two platforms, for varying levels of conversion.
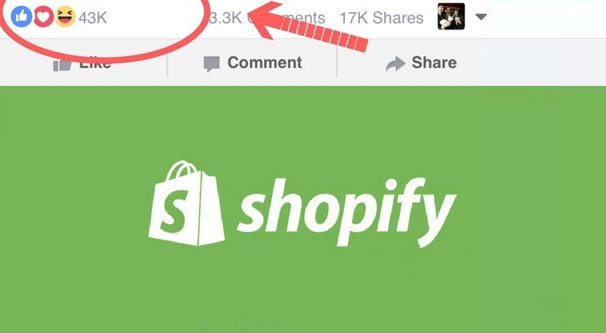
1. Use Social Sharing Buttons on Your Store
Probably one of the easiest ways you can link up a website and Facebook is to use the Facebook social sharing button.
You can do this with code directly from Facebook for the buttons, or you can use any of a dozen different social sharing plugins designed explicitly for Shopify.
- The Social Media section of the Shopify App Store contains a wide variety of different plugins that can add social sharing buttons, and every social sharing button suite will include Facebook as an option. Some are free, others have limited free plans, and others cost money. Feel free to browse.
- Some Themes for Shopify come with a place for social sharing buttons already enabled. All you need to do is check your theme configuration and look for a place to plug in your links.
- You can manually add your buttons to Shopify. This page includes step by step instructions for adding your assets, and you can go to Facebook’s developers section to get your code for the Facebook buttons.
Once you have a button enabled, users will be able to share products directly from your store, which helps spread the word about your store and get you more traffic and eyes on your products.
2. Install the Facebook Pixel on Shopify
The Facebook Pixel is tracking code you can add to your store. This allows Facebook to track information about your users, which you can use for remarketing and cart abandonment ads, audience building, demographic analysis, and a whole lot more.
![]()
The actual process for adding a pixel isn’t too difficult, but it has a lot of steps, many of which are preliminary setup you may be able to skip depending on your situation. Shopify has a very helpful page in their help center here to walk you through the process.
I highly recommend it. The Facebook tracking pixel gives you an absolute ton of information about your audience, and it helps you with advertising and remarketing. Since one of the best audiences to market to is a remarketing audience, this can be invaluable for increasing your conversions. Cart abandonment can be a thing of the past with a good remarketing campaign.
3. Use Facebook Authentication
One of the biggest e-commerce roadblocks is always getting users to make an account. Every new account they make is a new username and a new password they remember, and if they use the same username and password as another site, it becomes another security liability if either one is hacked. Why not bypass the whole issue?
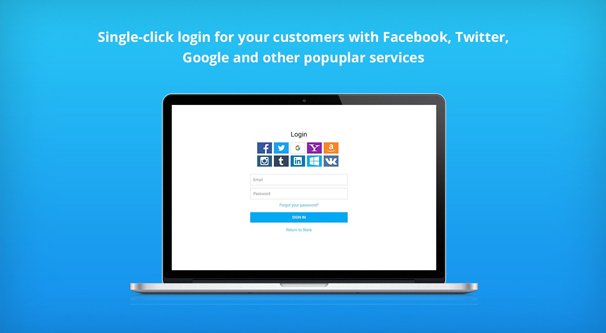
Plugins like EasyAuth allow you to set up an oAuth portal for social logins on your site. Rather than making users create new accounts, they simply connect their existing social media profiles to your site. It’s much better for security, it handles privacy as well as any social network, and it removes one major hurdle in the way of conversions.
This plugin in particular will run you $5 per month, but it’s very flexible and covers a lot of different authentication options. This includes the typical Facebook, Google, and Twitter, but also allows you to use Amazon, LinkedIn, and even Meetup accounts for authentication purposes. The more options there are available, the more likely users are to join in.
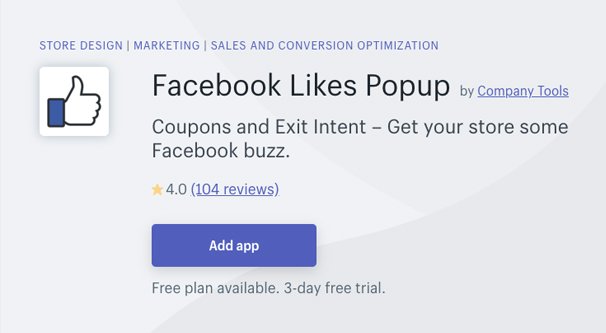
4. Convert Facebook Reviews to Website Testimonials
Facebook has its own reviews system, and while that system changed recently, it’s still a useful way for users to leave reviews of your business directly on your business page. However, it’s a lot harder to get users to leave reviews on your website. Why not make use of your Facebook reviews on your website as well?
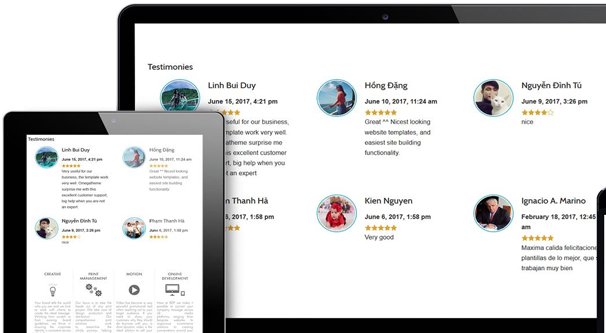
In this case, the Facebook Reviews plugin allows you to display your Facebook user testimonials directly on your storefront. This social proof can help convince others to convert, and it lets your user reviews pull double duty.
Of course, at this point you need to spend the effort getting people to leave reviews in the first place, which isn’t always easy. Plus, if you use this kind of automatic plugin and you get review bombed, it can be tedious to have to manage it to remove negative reviews from your site.
5. Run Facebook Ads to Your Store
Possibly the easiest form of “integration” between Facebook and any other site is to run Facebook ads that point to your storefront. Well, specifically, you probably want to run ads that point at a landing page rather than a store page or a product listing, but it’s up to you to do some testing to see what works best.
Facebook ads are a tricky system since there are so many moving parts, and a lot of the older guides out there aren’t going to apply because Facebook has been recently integrating the Power Editor and the basic Facebook Ads system to combine features. Look for guides published in 2019 and do some reading on how to optimize things like your quality score, your landing page optimization, and split testing.
6. Use Facebook Messenger on Shopify
Formerly Facebook Messenger, the Messenger app is now more or less stand-alone, though you still need a Facebook account to use it as far as I’m aware. Shopify provides a way for you to link up your Messenger account to your Shopify store. This does several things, primarily in allowing users to contact you via Messenger for customer service and for sales assistance.

What’s really cool is that Messenger is actually way more than just an instant messaging platform. Users can browse your catalog directly within Messenger and can even buy products through it.
Messenger also allows you to send messages to customers who have opted into receiving such messages, with order updates and status updates, and even occasionally with sales information. You have to be careful with this – you don’t want to irritate or drive away your customers with a lot of meaningless messages – but it can be an excellent direct link to customers.
Plus, the Messenger integration app is free and provided – and supported – by Shopify themselves. You don’t have to rely on third party integration and updates, and it doesn’t cost anything above and beyond the basic Shopify costs.
7. Use a Shop Now Call to Action Button
Another simple level of integration on Facebook is to customize your call to action button on your Facebook Page. You do have a Facebook Page for your store, right? You aren’t going to get very far with integration between the two platforms if you don’t. Of course you do, who am I kidding?
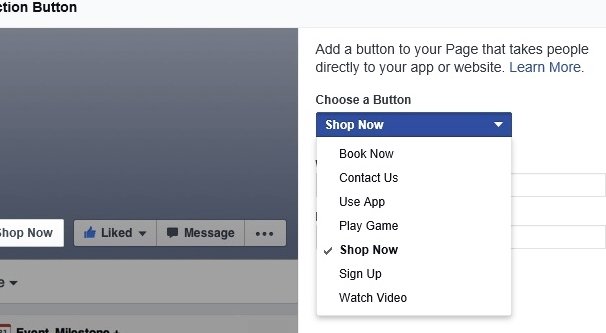
On Facebook, navigate to your Page. Up at the top, underneath your cover photo, you should see a blue button to the right side. It will have some kind of call to action on it, depending on whatever you decided to set before. Hover over the button and you can choose to test, edit, or delete the button itself. If you don’t have a button currently, the option will be to add a button. Click add or edit.
Now you will need to choose the kind of call to action you want. In this case, choose Shop With You, and then Shop Now. Choose to send people to a website link and plug in the link of your storefront. Alternatively, choose Shop on your Page, if you want a Shopify Store Tab. I’ll go over that in the next integration. Once you plug in the appropriate link, save it and test it to make sure it works, and you’re good to go.
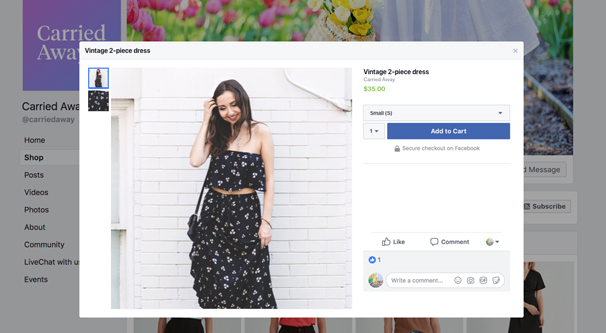
8. Integrate a Shopify Store Tab on Facebook
One of the main benefits of a Shopify store is the ability to run a store as a tab on Facebook. This means you have a “shop our products” link on the left-hand column of your page, and users can click it to browse your catalog and shop from directly within Facebook. They don’t need to leave the site, since all of the content is loaded in an iframe directly in Facebook.
The technical name for this is a Facebook Channel, and you can find the app on Shopify’s app store here.
If you don’t have a storefront set up and you’re considering implementing this, I might caution you to wait for a few months before you start. Facebook recently announced a major redesign of their site to roll out over the next few months, and there’s the chance that they will be demoting or hiding tabs in a way that could make it more difficult to use an integrated storefront. There’s not much available information yet.
Also, the Shopify-provided app isn’t super great. There are other apps, and you can use workaround processes with Facebook itself, but you may need to research those on your own. I don’t have specific recommendations for you at the moment.
9. Sync a Facebook and a Shopify Store
The above option works if you want to use Facebook as your sole storefront, but what if you want your store on your own domain as well? You can sell in both locations, but then you have to deal with tricky inventory management and order fulfillment in different channels. It’s tedious and annoying to have to deal with multiple simultaneous similar channels, but thankfully Shopify makes it pretty easy.
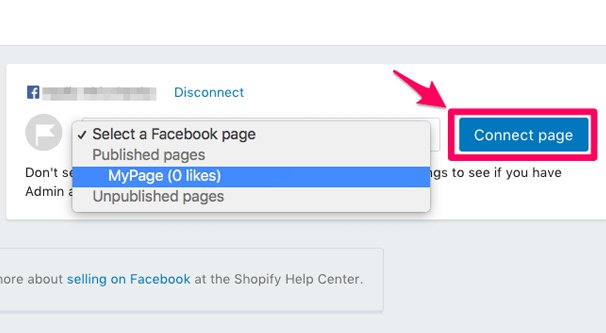
One of the options in the Shopify Facebook app is to allow you to sync your storefronts. This basically means that if a product is sold on one storefront, it is marked as sold on the other; the inventory management and everything else on the back end is the same system.
The main thing you need to be aware of, for both this and the previous option, is that Facebook needs to review your store before they approve it and you can start selling. They need to make sure you aren’t selling products that are against their terms of service, or that you’re otherwise abusing their audience. This review can take a couple days, so be sure to set everything up before you want to get started selling.
10. Integrate with Instagram Shopping
I know, I know: Instagram isn’t Facebook! Well, actually, it kind of is. Instagram is owned by Facebook, and as such, several Facebook systems work with Instagram as well. Ads are the big one, but Instagram’s Shopping system works well with Shopify if you can get the right plugin.
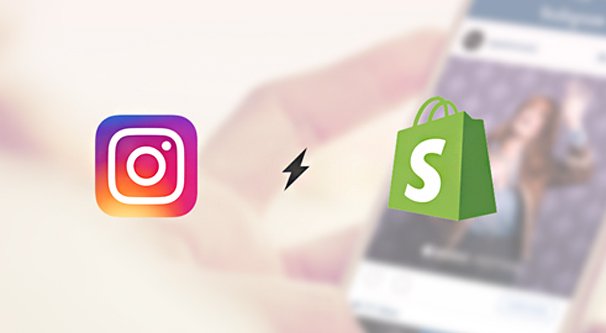
There are several options for you here. You can use the Instagram shopping system with tagged products on your Shopify store. You can use Instagram Feeds embedded on your storefront to showcase products in action. You can also use the Instagram Channel app, though like the other official apps, it doesn’t have the best reviews. Still, the choice is yours on how you want to integrate the Facebook platforms and Shopify.